Step by Step Use of Kinemaster Android Editing app
Use of Kinemaster Android Editing app

Kinemaster is a very complete video editor, with many customization possibilities, filters, brightness, contrast, saturation, transitions, titles, themes, etc., that can be handled in a fairly simple way and with good results. To use it you do not need to be an expert, just take your smartphone, download the app, and start creating your own videos. To know how to use it, check the step by step guide that we offer you here.
Step 1:
After opening the application, you must create a new project by pressing the + symbol at the top right. Then follow the three steps that will appear on the screen.
- Select Medium. Choose the videos and photos from the device.
- Enter title. Add an input title and an output title to the project.
- Select the topic. Choose one among many themes: Travel, Summer, Snow, Alien Invasion, etc. You can download more than the default ones in the app. Each theme has predefined music that can be changed once you are with the project running.

I recommend you organize the video or photo files on the reel of your device beforehand, so you can find what you need much faster. To do this, create one or more specific albums. And if you can, import the files in a certain order, because when you get to the timeline you will have the images in the order in which you imported them.
After importing it asks you the opening and closing title. You can indicate this later.
Step 2:
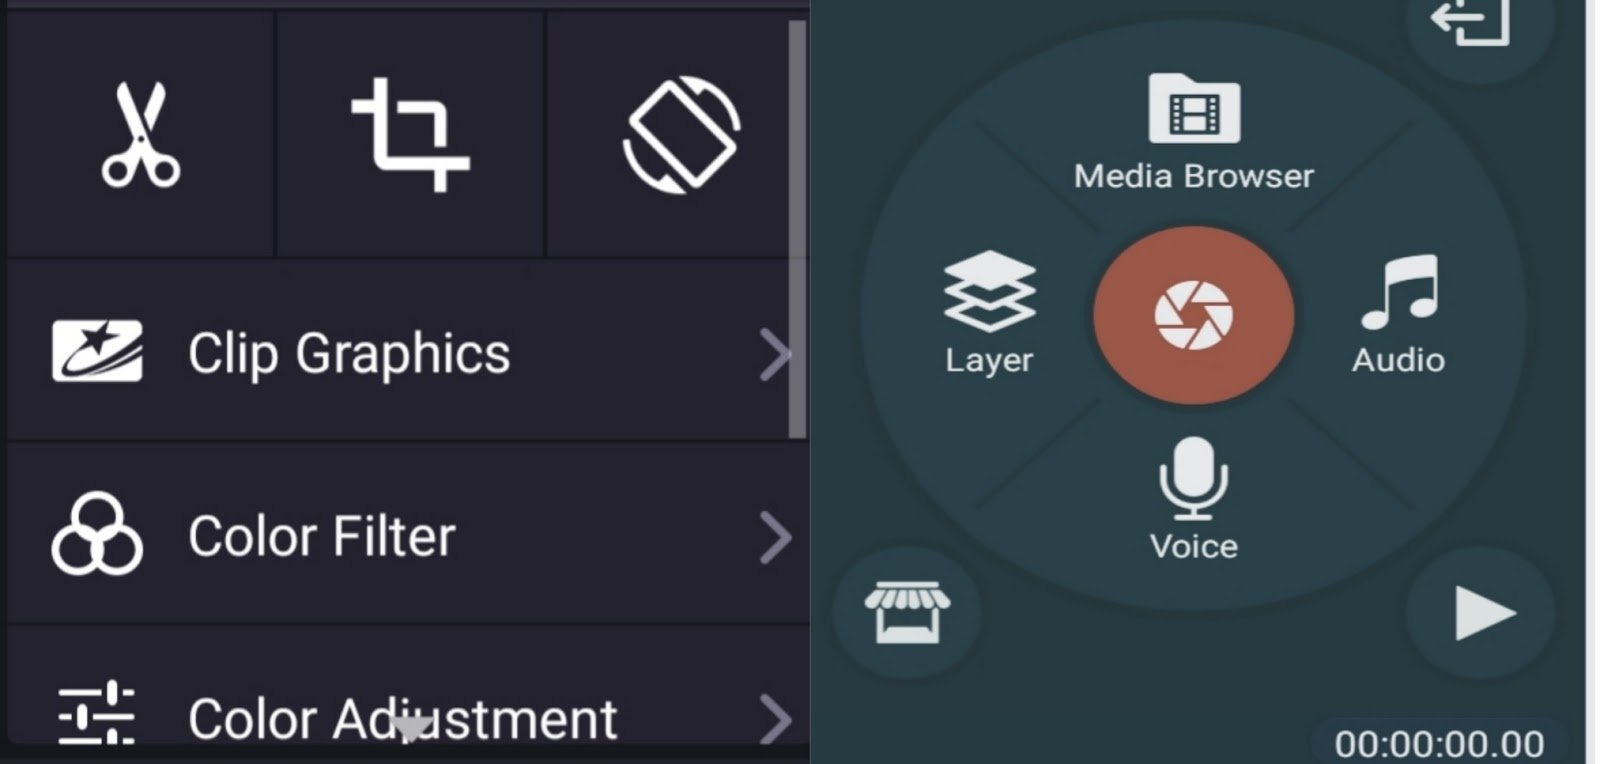
Now it’s time to refine the durations and edit. Customizing video plans in Kinemaster. If you click on a video plan you will have, in this order, the customization possibilities:
- Rotation, to put the video in horizontal/panoramic if you have recorded it vertically and avoid SVV or vertical video syndrome.
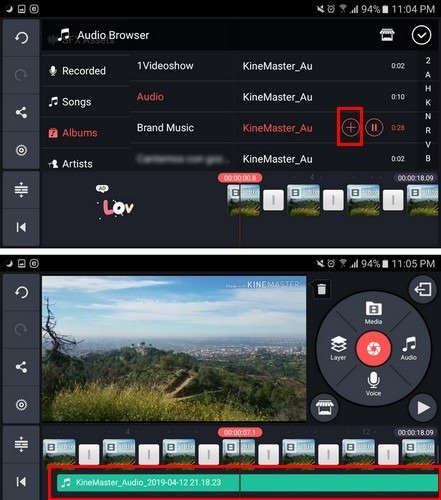
- Audio. It allows you to raise or lower the sound level of the video and choose the level of the background music if you have set it. You can also specify the levels even more with the keyframes in the option at the end, which looks like a graph.
- Titles. Not only can you choose the theme, but you also have many more to choose from.
- Cuts. Decide the length of the shot. When you select it in the timeline, two points appear on each side of the plane that allows you to cut with your finger, at the beginning or end of it. Or if you have the cursor at a point, it allows you to trim to the right, left, divide the plane or extract the soundtrack.
- Filters and image retouching. You can choose between 17 different filters to personalize your video. If the filters are not enough, or you prefer another type of retouching, you can modify the brightness, contrast, and saturation parameters.
- Plane speed. With this regulator you can choose the speed of reproduction of the plane, to put it in fast, slow motion …
- Frame capture. It allows you to capture the frame that is playing, freeze it, and put it to the left or right of the image as a photo or split the video plane and insert it in the middle. Try this to add dynamism to the video, but remember the minimum duration of 0.7 seconds, which limits you a bit.
Step 3:
Photo customization. Kinemaster is a creator of fantastic Slideshows, you can import photos, give them individual titles, make zooms, very diverse transitions, add songs, etc. When editing the customization options, they are very similar to video options, with some exceptions.
Movement in the photo. All photos include movement. You must adjust the starting position and the ending position. If they are larger than the resolution you are using in editing, especially if they are wider, it will take a little longer to adjust if you want the photo to be fixed. But if you have the imported images already measured, with a simple double press, «double-tap», with your finger on the screen it will adjust the width. By moving it with your finger you can fix its final position. It is quite intuitive and easy to use.
The rest of the options vary very little. You can personalize your photos from the timeline with filters, image retouching, titling … And of course, you can give duration to the shot, but with the limitation of 0.7 seconds minimum.
Step 4:
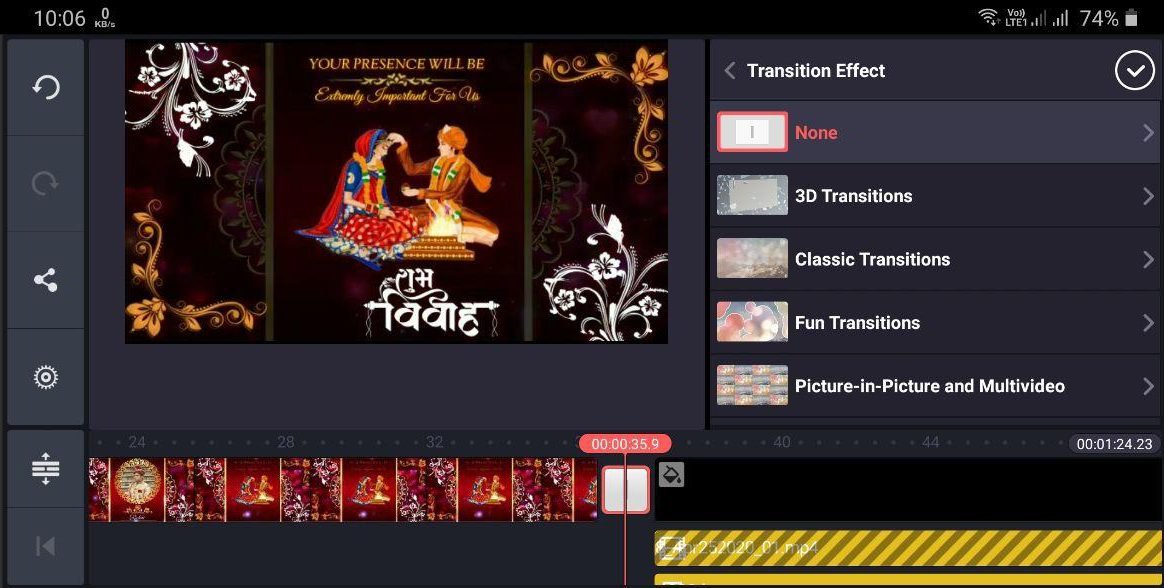
Transitions between planes. In addition to the usual transitions from chained fade, color fade, etc. this video editor has many other curtains. There are 3D options, sweep, large to small, lots of options.
Step 5:
Export the edited video in KineMaster. Once the editing is finished, the video must be exported. Go to the main project selection window with the Android back arrow and click on the button at the bottom left.
Select between HD 1280 × 720, high definition, and low quality 640 × 360, (the latter would be enough to send the video via WhatsApp). When you press Export, a window appears telling you that if you don’t subscribe, your video will have a watermark.