How to Use Autodesk Maya Software
Use Autodesk Maya Software

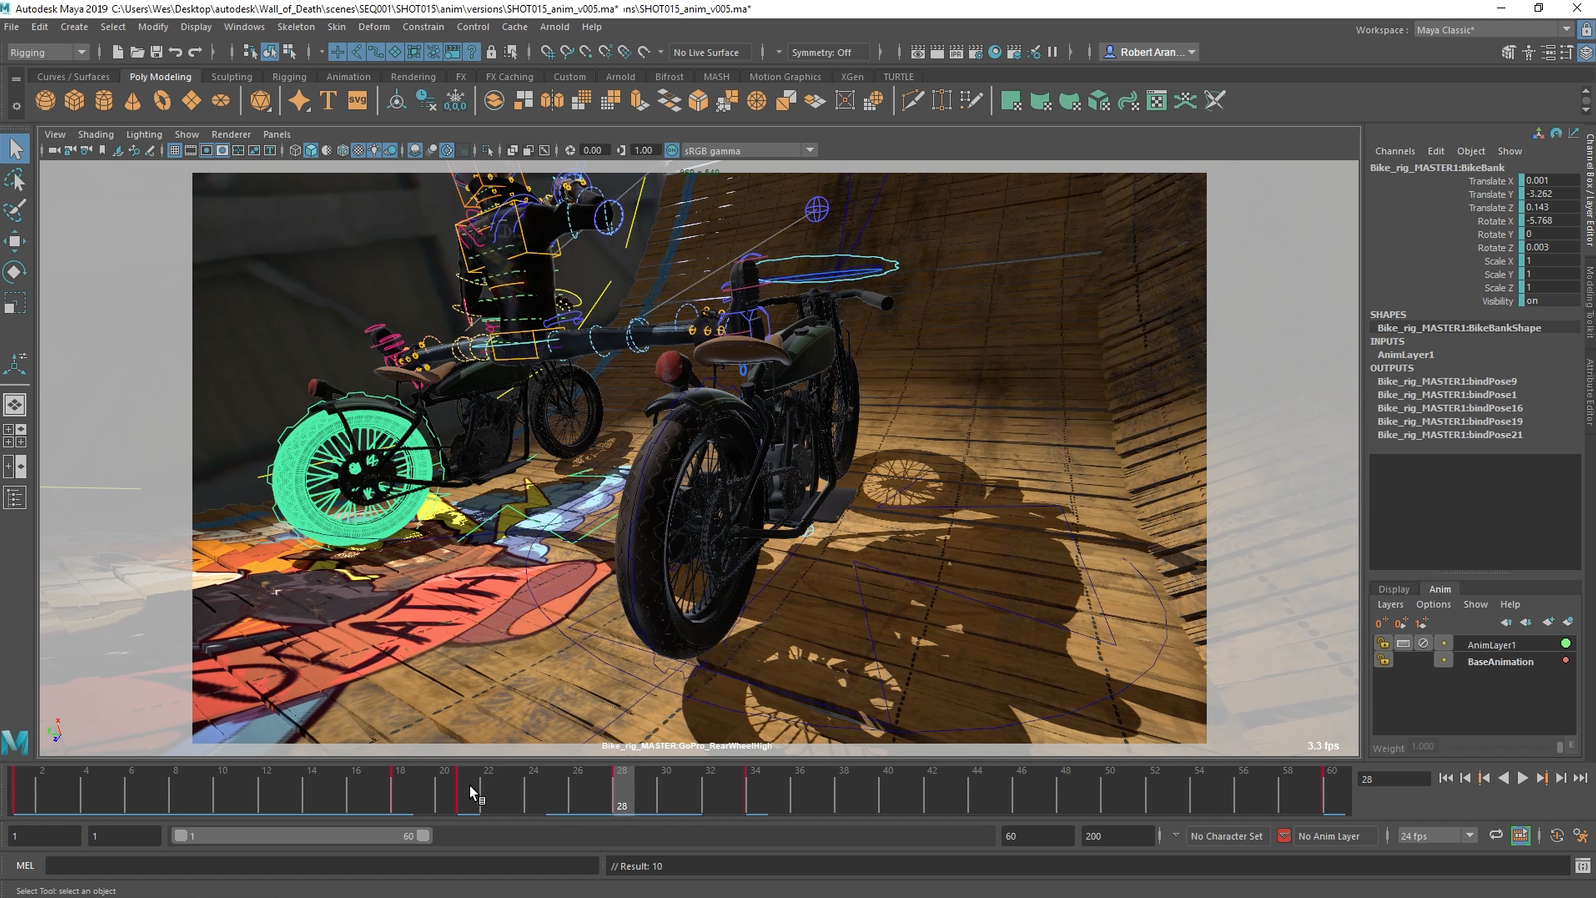
Autodesk Maya is a software developed by Autodesk, its main function is 3D modeling, rendering, and animation, although it also allows the creation of special effects and simulations of clothes, hair, fluids, etc. PC and Mac versions are available.

It is a very powerful program and widely used in architectural firms due to the good results it offers in terms of infographics and 3D modeling, its use is very varied among different professionals, in fact, it is one of the most used 3D software in the film industry (it is awarded an Oscar).
Learning to use Autodesk Maya is a professional advantage in order to improve the results of your graphic products (infographics, graphics, dashboards, advertising, etc.) in addition to being a program requested in many job offers.
The first thing you will need if you want to learn Maya is to have it installed on your computer. Like most professional software, they pay Maya. However, there is a trial version that will help you learn how to use it. Let’s see how to use it creating an animated logo forming from particles to have some first experience with the software.
Step 1:
Open new scene, go to “Create” and open the options box for
“Text”. There adjust the following options then press “create”.
Step 2:
Hide the text curves in the “Outliner” by pressing (Ctrl + h). Select all the letters, then go to “Mesh > Combine”. Delete the history for the shape, then go to “Modify > Make Live”.
Step 3:
Switch to “Dynamics Menu” by pressing “F5”, then go to “Particles > Particle Tool (option box)”. Press on “Reset Tool”, then adjust the settings as shown.
Step 4:
Hide your grid, switch to the front view, and start to draw on the letters. Make sure to fill from the inside and on the edges as shown. Press “Enter” then, in the “Attributes Editor” for the particle shape, go to “Render Attributes > Particle Render Type > Cloud (s/w)”. Note: When you press “Enter” you have to wait for the program to calculate the particles.
Step 5:
Press on “Current Render Type”, and set the radius to “0.025”. Hide the original text surface in the outliner, then open “Hypershade” and select the Volumetric Node “particlecloud1”. Modify the attributes for the particle cloud.
Step 6:
Extend the playback range time to “200 frames”, then select the particles, and go to “Fields > Volume Axis”. Modify the attributes for the volume axis field. Modify the “Transform Attributes” for the volume field.
Step 7:
On frame “1”, set a key for the volume axis field at “Translate X” with a value of ’20’. Go to frame “100” then set another key for the volume axis field “Translate X” with a value of “-3.000”.
Step 8:
Go to “Window > Settings/Preferences > Preferences”. Select the “particlecloud1” material, set its transparency to “0”, then set a key on the current frame (200). Go to “Window > Settings/Preferences > Preferences”.
Step 9:
Go to “Solvers > “Create Particle Disk Cache (option box)”. Make sure that the options look like the following image (except for the scene directory), then press create. Note: Wait for the particle cache to be generated and until it stops at frame 200.
Step 10:
Select the “particlecloud1” material, set its transparency to “0” or “White” color, and then set a key on the current frame (200). Set the current time in the time slider to “160”, change the transparency to “1” or a “Black” color, and then set another key.
Step 11:
Repeat the last 2 steps. Set a key for “Transparency” on frame “20” with “white” color or a value of “0”, then set a key with a value of “1” or “black” on frame “1”. Now show the original hidden text shape in the “Outliner”. Go to “Display > Show > Show Selection”, or press “Shift + h”.
Step 12:
Switch to Edge Mode by pressing “Ctrl + F10”, then press delete. Extrude the text shape to about “0.250” on the “Z-axis”. Center the text shape to the particles. elect the text, then separate the letters by going to “Mesh > Separate”. Create 6 new “Blinn” materials with the settings.
Step 13:
Name the 6 Blinn materials as the text letters (Blinn1 = M, Blinn2 = A etc.), and then assign the first one to the letter “M”. Go to frame “66” and set a key for the “M” material “Transparency” with the color set to “White” or “0”, then go to frame “64” and set another key with the color set to “Black” or “1”.
Step 14:
Assign the “A” material for the second letter, then go to frame “54” and set a key for the “Transparency” with the color set to “White” or “0”, then go to frame “52” and set another key with the color set to “Black” or “1”. Repeat these steps for the rest of the letters.
Step 15:
Make sure that the default light is turned on from the “Render Settings” and no other light source exists in your scene. You can now render the scene to video (AVI) or sequenced images (TIFF) from any camera view, and then reverse your animation in any video editing software (Adobe Premiere, After Effects, Sony Vegas, etc).


