How to Edit Video on Cyberlink Powerdirector
How to Edit Video on Cyberlink Powerdirector
CyberLink PowerDirector is a premium tool, but it is also intended for small editing jobs. If you have already reviewed Adobe Premiere Elements and Final Cut Pro X and have considered that they are too much for your projects, this software may be your solution.
This program offers an introduction to post-production tasks, to help beginners. In addition, this tool will allow you to join clips and optimize videos in a few clicks, which makes it ideal for creating basic content quickly, such as quick videos to upload to Facebook or other social networks.
All this does not mean that it is a basic video editing program, this tool offers an interface based on panels and timelines, like professional editors. Sometimes, it can take time to know the precise controls to carry out the editing process you want. But all the filters are flexible and allow you great editing processes if you know how to use them, it’s all a matter of starting to explore.
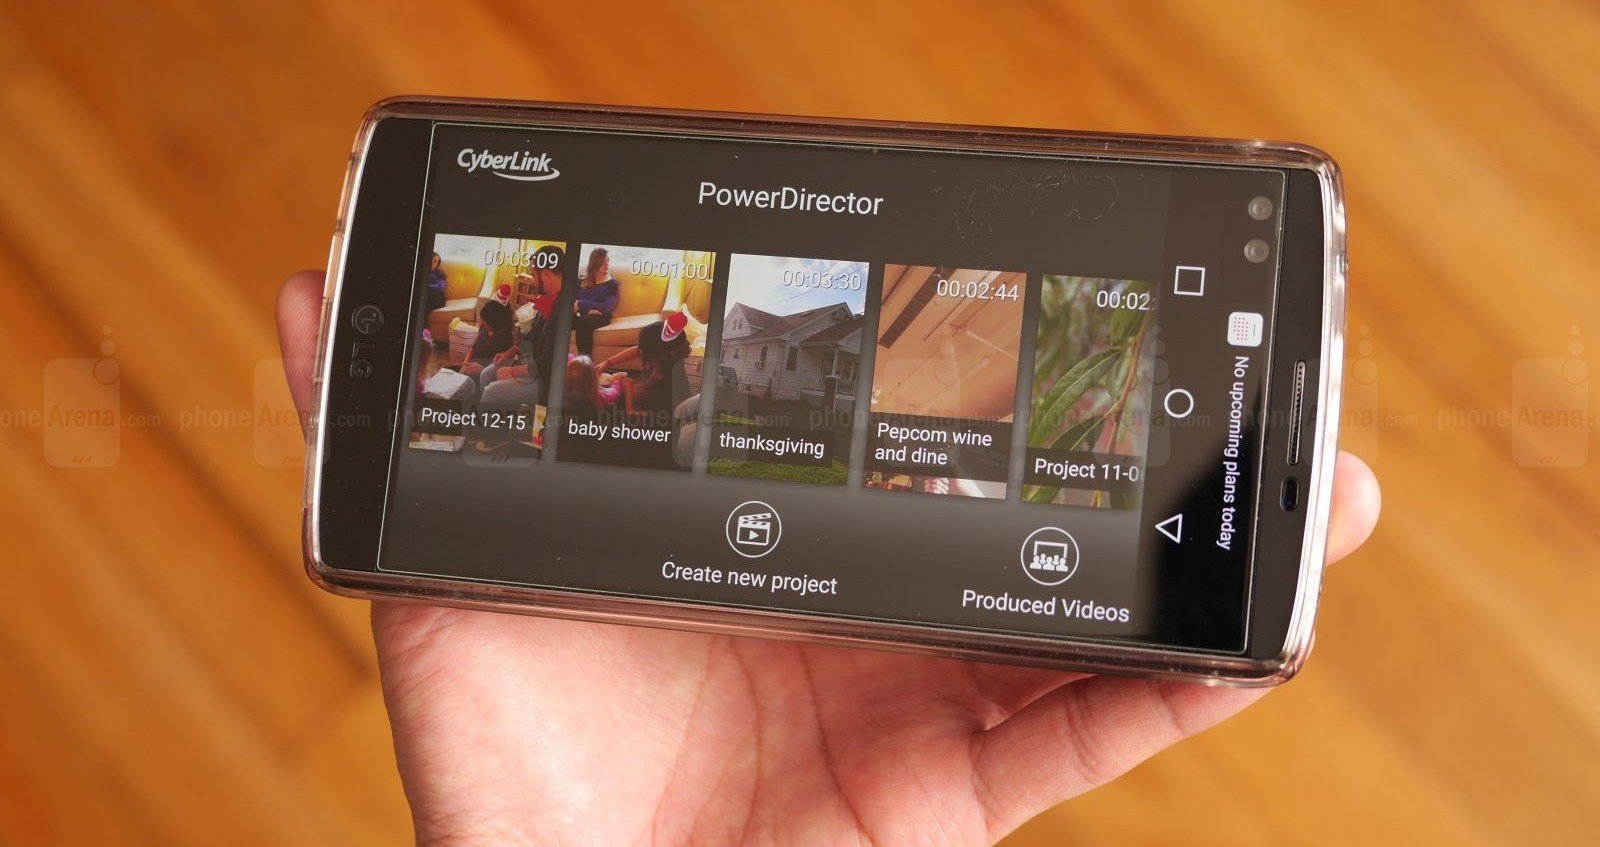
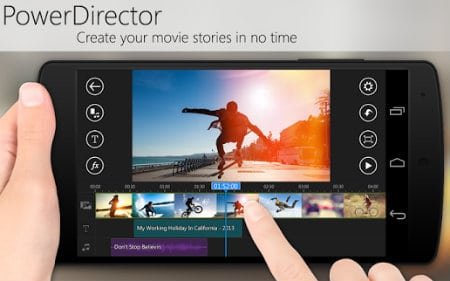
PowerDirector Allows Us to Edit Video on Android
PowerDirector Mobile is an editor with a “classic” editor interface so you can create your own video stories. Therefore, you can download the application, there are two versions: a lite/free version that you can download from Google Play. This version includes three limitations:
- You can export at 720p maximum.
- There is advertising built into the interface.
- The video includes for the first 5 seconds a “Watermark” that says, Edited by PowerDirector, which is not so annoying.
The other version is more complete but it is paid. This option will give you:
- Full HD video quality when producing videos.
- Videos produced without watermark.
- You can enjoy an interface without ads.
Editing Video in PowerDirector for Android
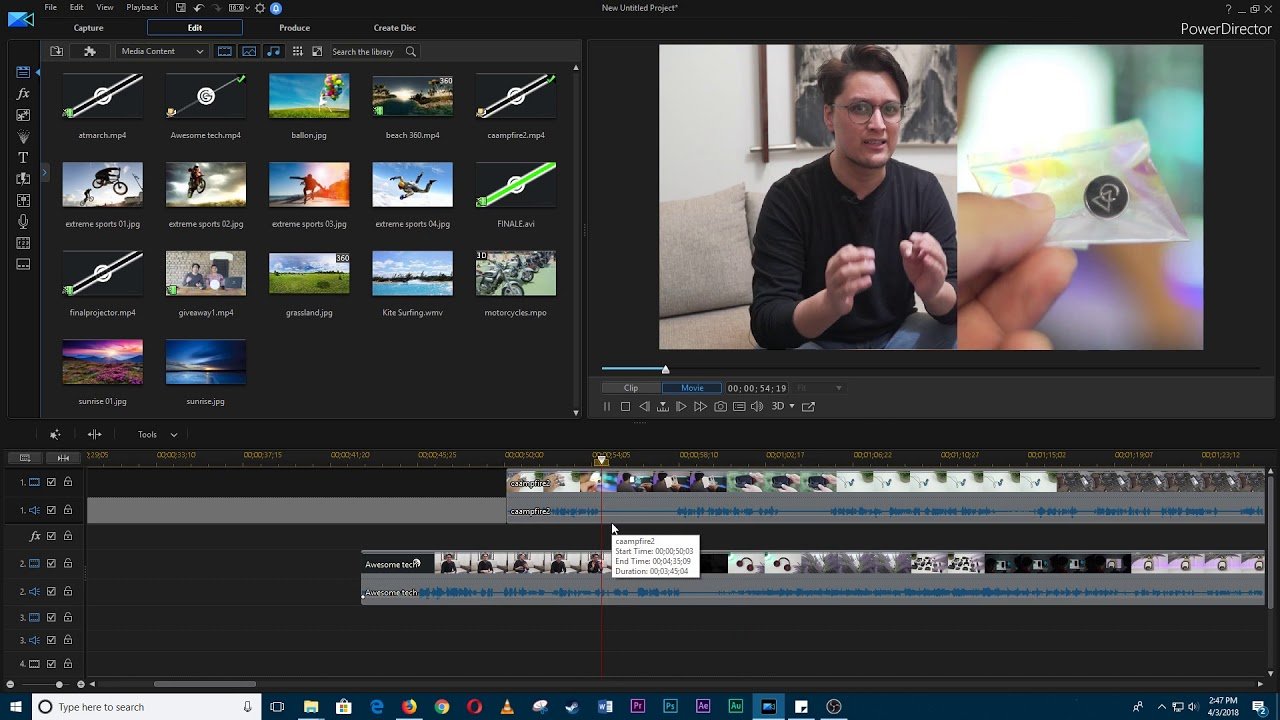
We start the app and create our first project, give it a name, and edit it. The program view is a classic interface, which includes:
- The content window, where you can choose: videos, photos, music, effects, titling, and transitions.
- The preview window where we can go the preview of the edited video and if we have selected a video or photo, we can see it.
- The timeline, with three tracks: video, titling, and audio.
If we click on the camera icon we can choose videos, if we click on the photo, we will choose our images and on the musical note the soundtrack.
It does not group the materials by folders, so when choosing a video, photo, or song, depending on the icon pressed, you will have all the videos available on the device to edit. There is no sort of classification. But, on the good side is that the file names are in the thumbnail, which you will be able to distinguish if you have renamed them.
1.- Move multimedia materials to the timeline
There are two options to move the materials to the timeline, clicking once on the thumbnail to bring up a + sign or dragging to the video track on the timeline. If you press the + the material becomes full at the end of the timeline.
2.- Adjust the duration of each plane
Once the video, photo, or music is on its corresponding track in the timeline, it is when you delimit the duration of each shot. When you click on the track thumbnail, it will appear highlighted with two circles on each side of the plane, which serve to shorten or lengthen the material, adjusting it to the duration you want.
The ambient sound cannot be treated separately, you cannot lower the level of each shot independently, you can mix with the music, but the mix is for the entire video.
3.- Transitions between planes
23 different transitions are available in this version. Among which are the typical chained melt, sweeps, evaporations, etc. Each comes with a default duration that cannot be changed. They are placed between two video planes.
4.- Effects
There are 11 different effects at your disposal: Kaleidoscope, Blurs, filtered by color: blue, green and red, TV wall, sepia, reflection in the water. The pity is that they are predefined, without any possibility of customization.
5.- Title
The predefined options that PowerDirector offers us are all animated, so we cannot put something simple like a name or a date. Everything appears by animation.
6.- Finish the edited video
Well, we already have the edited video, now we are going to compress or upload it to YouTube or Facebook. Click on the bottom right, where it says “Produce video”.
Some Key Features
- Include all of the necessary tools to create videos (capturing video from several different sources, adding the final touches to users ’creation via a customizable DVD-style menu, etc.)
- Includes over 500 video effects, animated themes, title effects, transition effects, particle effects, and PiP objects.
- Save video on the hard drive in different formats, publish it to Youtube and share it on Facebook.