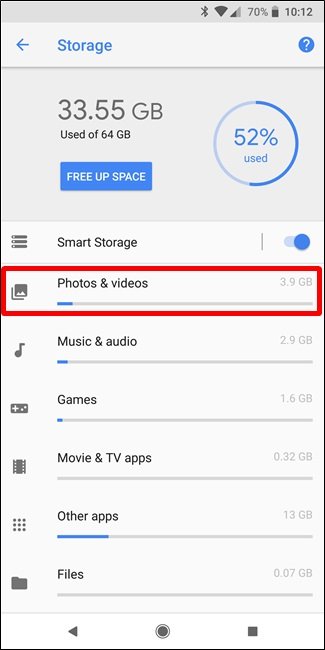
Running out of free storage is next to the battery, one of the problems that many users have to deal with every day. We cannot have all the applications, games, and files that we would like, so we always have to have very good storage management to avoid problems.
When our Android device already has very little free storage, it no longer allows us to install more applications and if we miss the warning many applications will stop working correctly since synchronization will be deactivated, with which we can stop receiving messages, SMS and other notices until that we do a cleaning to free up space.
For our device to work normally we have to do the cleaning in the storage, and for this, you will only have to follow the following tricks and tips:
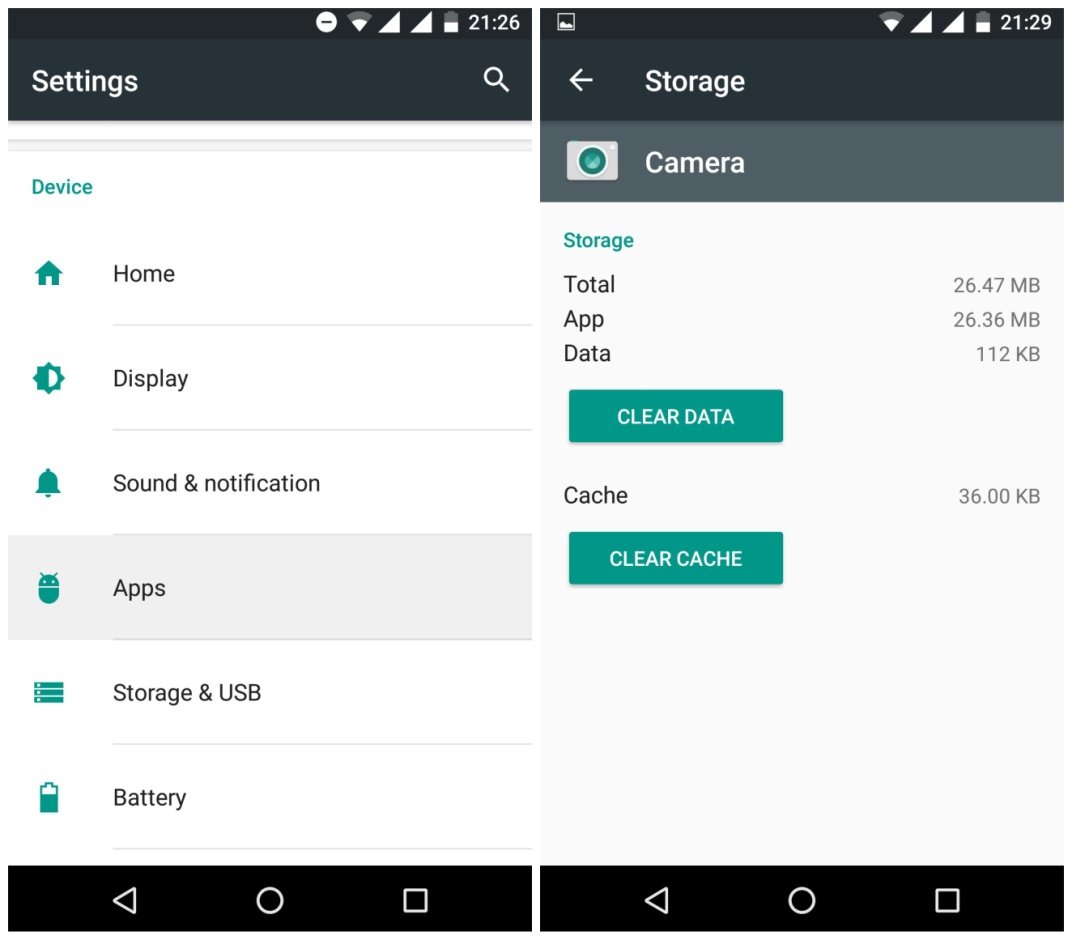
1.- Clear cache
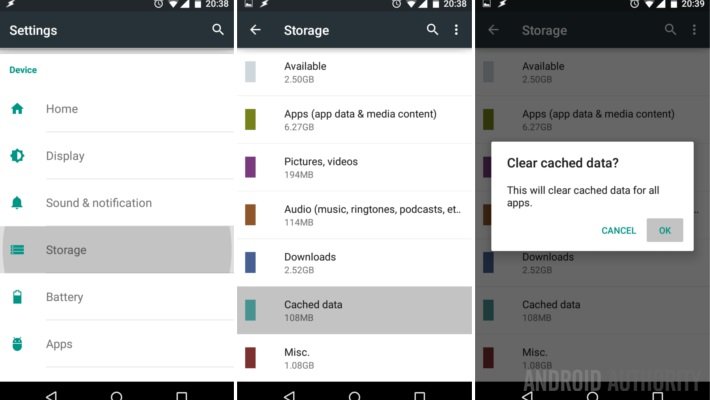
First of all, it is to clear the cached data of all installed applications and games. As of Android, you can delete the cache data from the system settings, from Settings > Storage and by clicking on Cached data. If we have an older version of Android we can resort to applications like Clean Master or CCleaner.
2.- Delete downloads
The next step to free internal memory is to enter the Downloads application and delete all those files that we will no longer need.
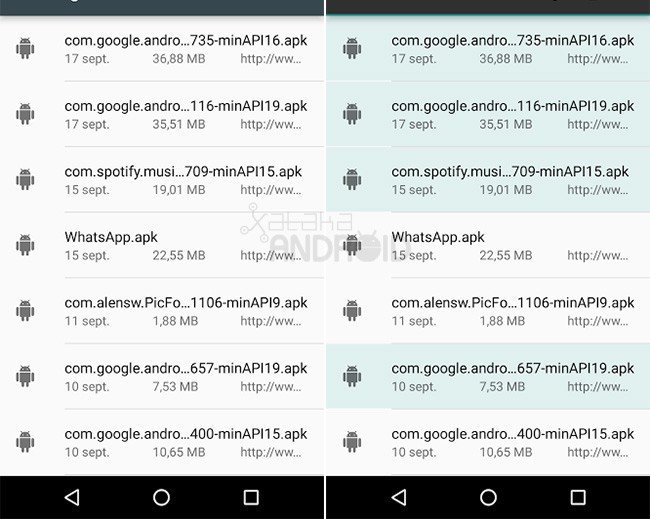
3.- Clean photos, videos, music, and other files
Another step, but more laborious, is to do general cleaning, deleting all those photos, videos, music, and files from applications like WhatsApp that we are not interested in keeping in storage. We can do the cleaning from a file explorer or from the applications themselves.
4.- Upload your photos, videos, music, and files to the cloud
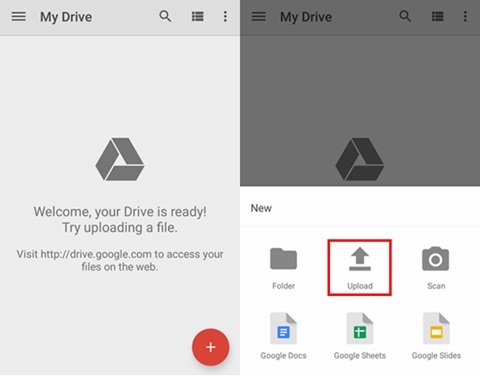
It is advisable to always have a backup of all our files in the cloud so that you do not have it on your device. To save photos and videos in the cloud we have different options such as Google Photos or Flickr, and to save files in general we have Google Drive, OneDrive, or Dropbox.
5.- Delete backed up photos and videos
If we are saving a backup of our photos and videos in the cloud, we can delete their copy on the device. For example, in Google Photos it has the Free up space option that suddenly removes all our backed up photos and videos from internal storage.
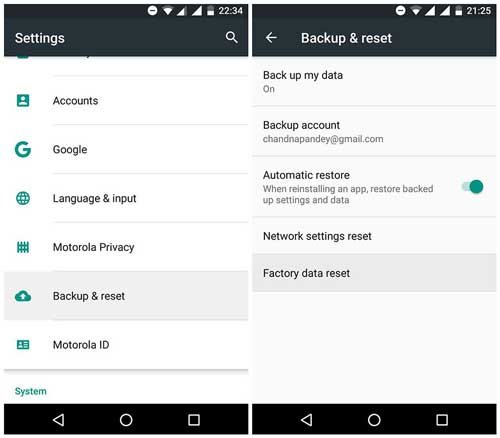
6.- Clear app data but be careful!
Another option to free up storage is to delete the data of the applications, but with this step, we have to be very careful, since we do not have to do it in all the applications. This step deletes everything from the application, leaving it as newly installed, deleting our data, accounts, games, etc … The data is deleted from the application information.
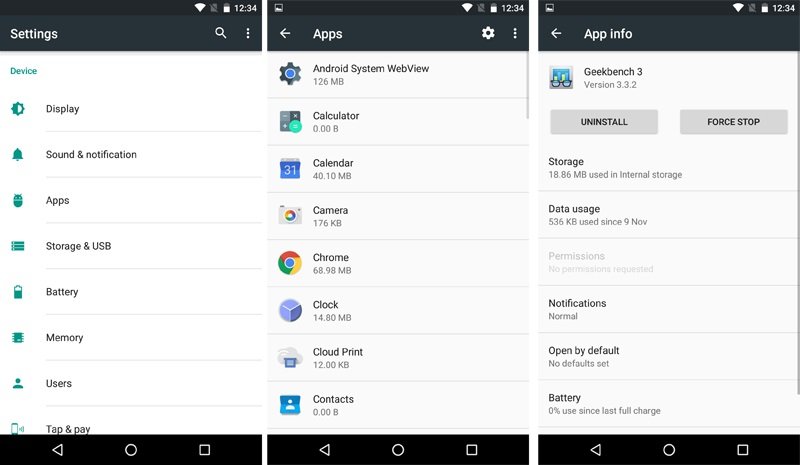
7.- Move apps to microSD card

If your device has a microSD you can see if your version of Android allows you to move the applications to the microSD. To do this, go to Settings> Storage> Applications, click on an application, and see its option to Change the type of storage. If it lets you, choose the microSD.
8.- Uninstall apps
The last step to freeing up storage is to uninstall the applications that we no longer use. To do this, see if your application launcher or the settings of your device allow you to sort the applications by use to see which are the applications that have been used a lot without using them. If not, go through your app drawer one by one to eliminate those that you know you won’t need.